


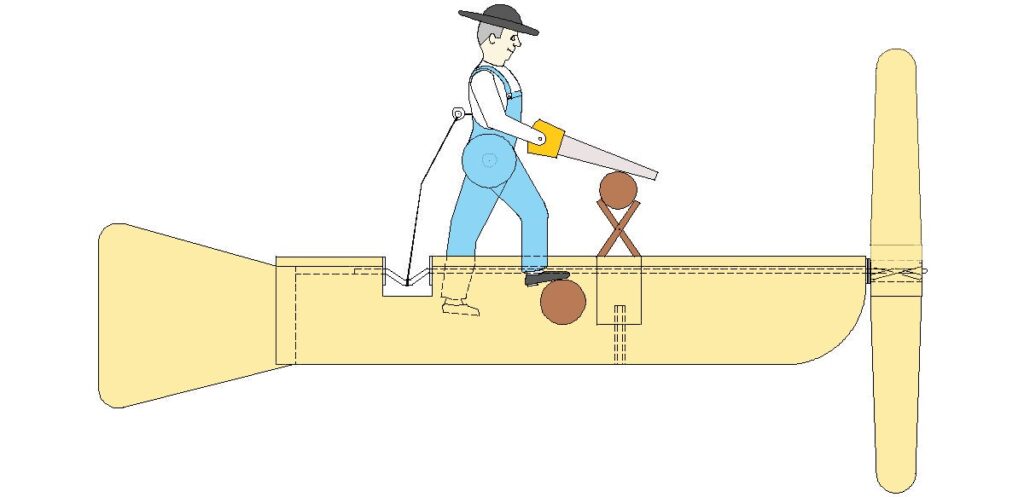
Here’s my version of a sawyer whirligig. The body swivels at the hip area and at the wrists. You may have to play with the amount of offset in the drive rod, depending on how much travel you want for the saw blade. And please note that this page contains affiliate links. If you were to buy something from these links, I get a small commission (at no extra cost to you). This helps to keep my page online.
This is how the main body/frame is put together:

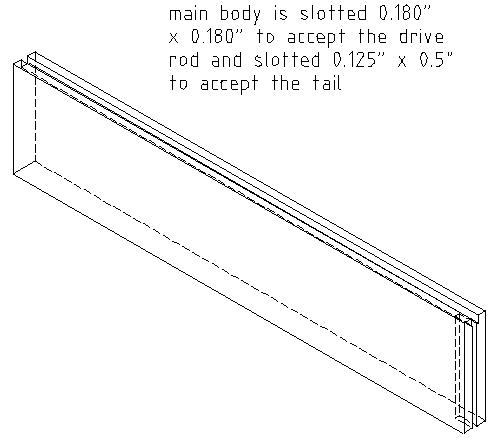
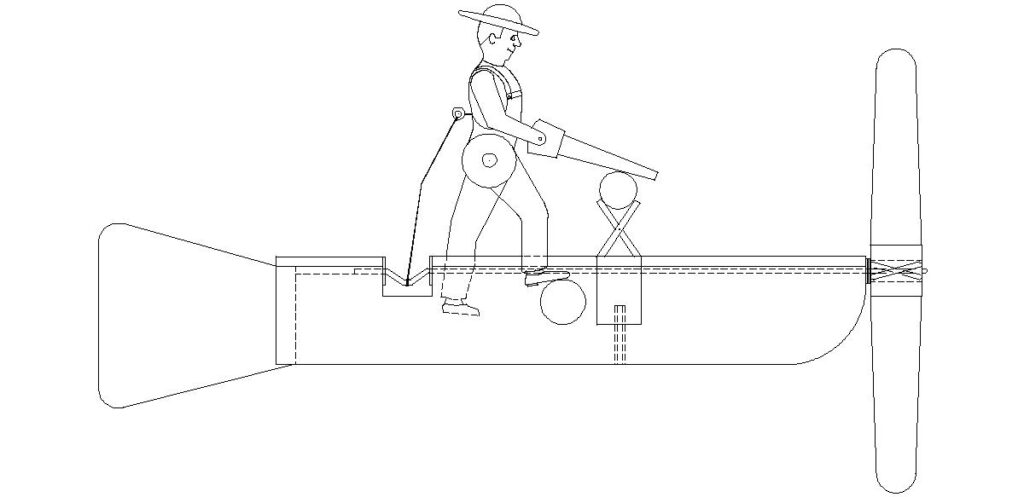
Here is the main frame/body. It is slotted along the top edge and slotted along one end.

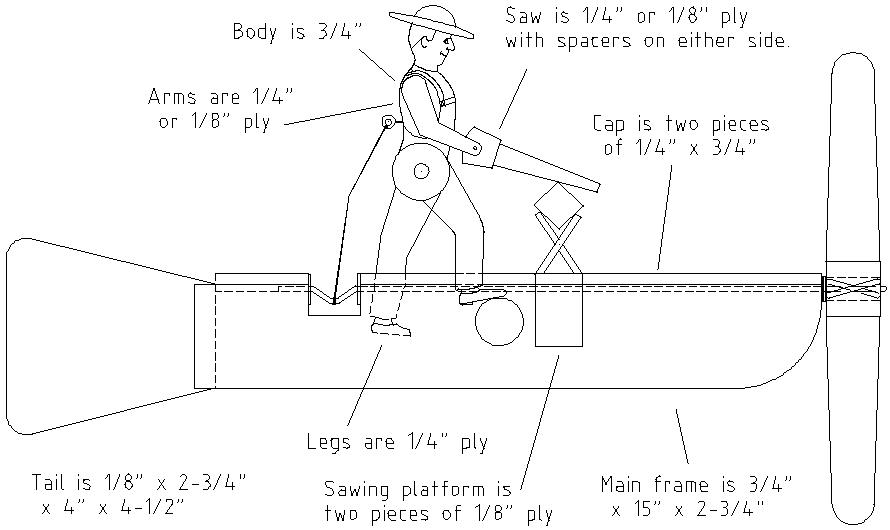
Here is the whirligig with parts labelled. The sawing platform is made from two pieces of 1/8″ plywood that are fastened onto the main frame. If you’re having a hard time finding 1/8″ plywood, you can have some delivered from here. There will need to be a piece of wood bridged between them to support the saw blade. The legs are also screwed onto the main body. Spacers or washers are added between the legs and the figure’s upper body at the swivel point. Spacers of the same thickness may be needed to fit between the lower legs and the frame body (spacers added here will prevent binding when the upper body swivels). The lower legs and the sawing platform overlap the frame body by approx 1-1/2″.
The drive rod shown is steel, about 1/8″ dia. You can find this at Lowes or Home Depot. If you don’t have a Lowes close to you, you can pick up steel drive rod here.

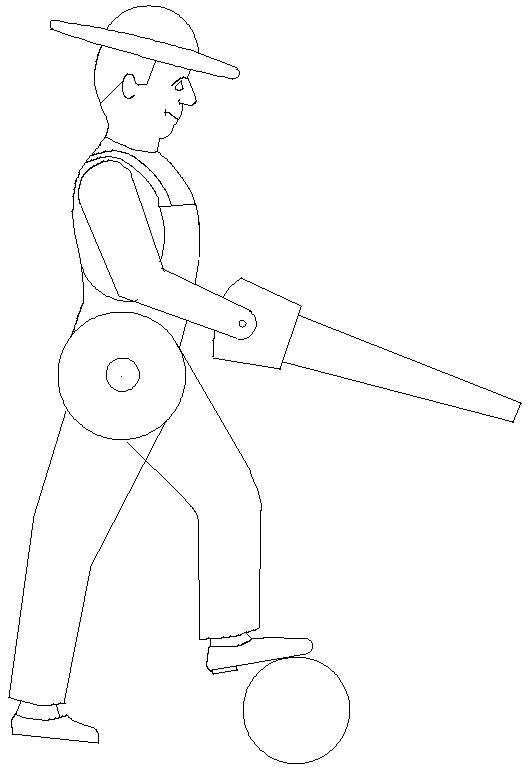
Here is a tracing template for the Sawyer. I believe I have sized it for approx 8″ height, so it will stand about 6-1/2″ to 7″ above the frame body.

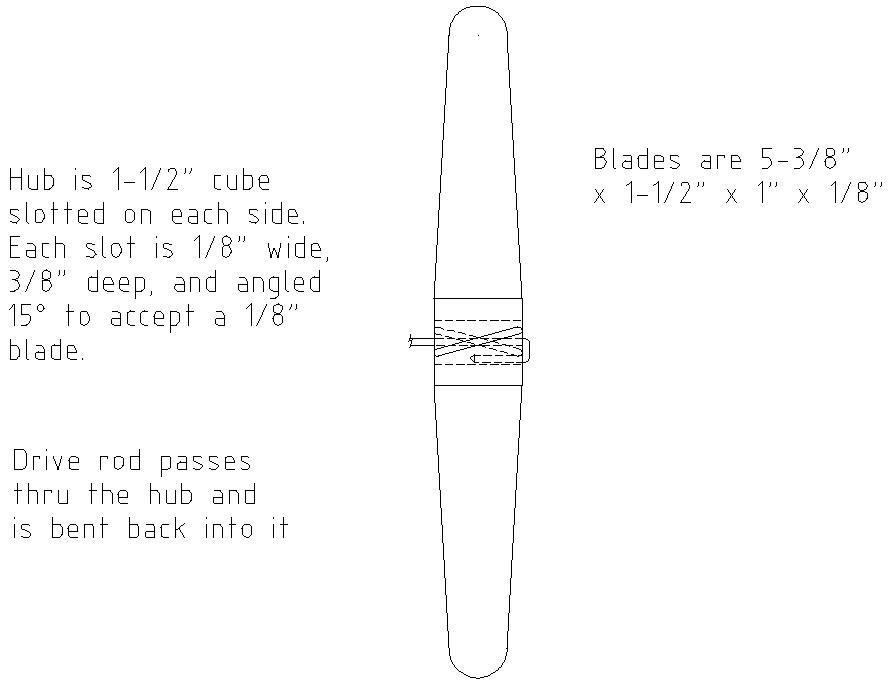
The mounting bushing needs to be sized so it will fit over a 1/8″ diameter nail or mounting pin (that will be located in the mating mount post). I am suggesting an OD of 1/4″ and an ID of 1/8″, length of 1″ to 1-1/2″, nylon, plastic, brass, or whatever material you can find. The bushing should be located in approx. the location shown. The important thing is that the whirligig will be pointing into the wind when the wind is blowing.
The final step is to paint the whirligig. Its important that all the surfaces be coated with paint. This is especially true if you are using plywood for any parts, since moisture will cause the plywood to swell and delaminate. I am not planning on selling my whirligig online, so I have drawn this unit using materials that I had/have on hand. If you are planning to make a whirligig for sale, I would recommend that you use solid wood wherever you can, and totally coat your parts with paint. If you are using plywood anywhere, just make sure it is fully painted and watertight.