


This whirligig was inspired by a GIF that I came across, showing how a figure could move by joining up 3 of the features with swivel connections. I used the principles shown in this gif to build this hammering whirligig figure.
Here is a figure drawing that can be used as a tracing pattern. It is a whirligig I’ve been working on lately. I’m calling it “The Animated Hammersmith”. When it moves, the figure’s body bends over as the hammer comes down, so it looks a little more realistic than the standard type of whirligig that just pivots at the shoulder or waist. It is a little more complex than most whirligigs, but its worth the extra care that you might need to construct it. I will show the exact dimensions that I used a little further down the page.


Here I have printed out my trimming patterns and pasted them onto some thin cardboard. I wanted to put together a model like this to make sure the geometry was right, and to make sure it worked the way I planned. The link between the shoulder and the forward leg will be made from a piece of wire, as well as the link from the drive rod to the figure’s back (this link is not shown in the above model).
This is how the prop is constructed. It is a 4 blade rotor with a square hub.


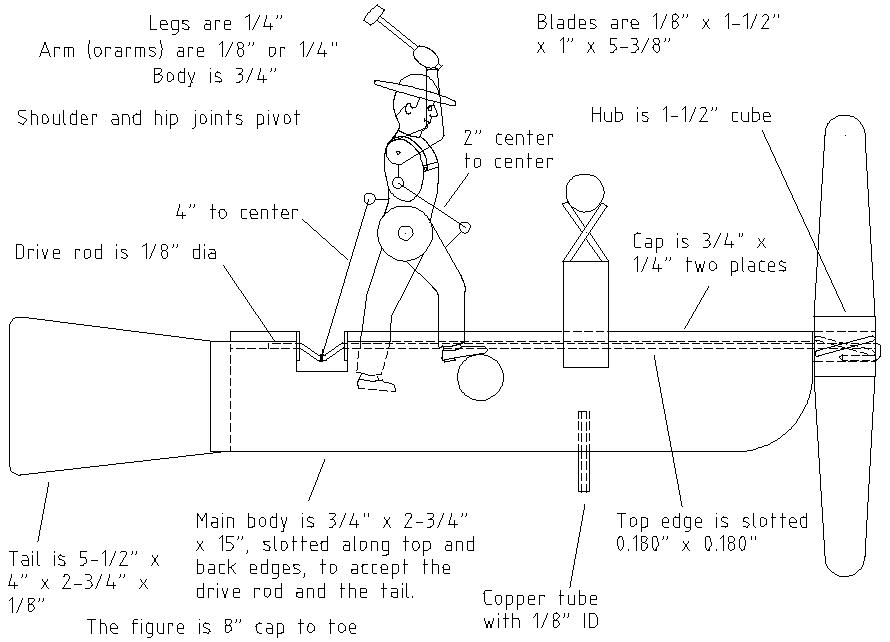
The legs are fastened onto either side of the main frame. Please note that I have shown dimensions for links, etc, that work with a figure that is 8″ tall. If you change the height of the figure, the sizes of the links shown may also need to be changed. The length of the 2″ link and the amount of travel in the drive rod offset will dictate how much movement you get when the figure hammers. For the drive rod, you can buy some 1/8″ steel rod at Home Depot or Lowes. If you would like to have a piece of 1/8″ rod delivered, you can buy some here.
If you’re having a hard time finding 1/8″ plywood for the prop blades and tail, you can have some delivered from here.
For the mounting insert location, it should be located somewhere forward of the center of gravity (the balance point, as determined by balancing the main frame on a round dowel or pencil).

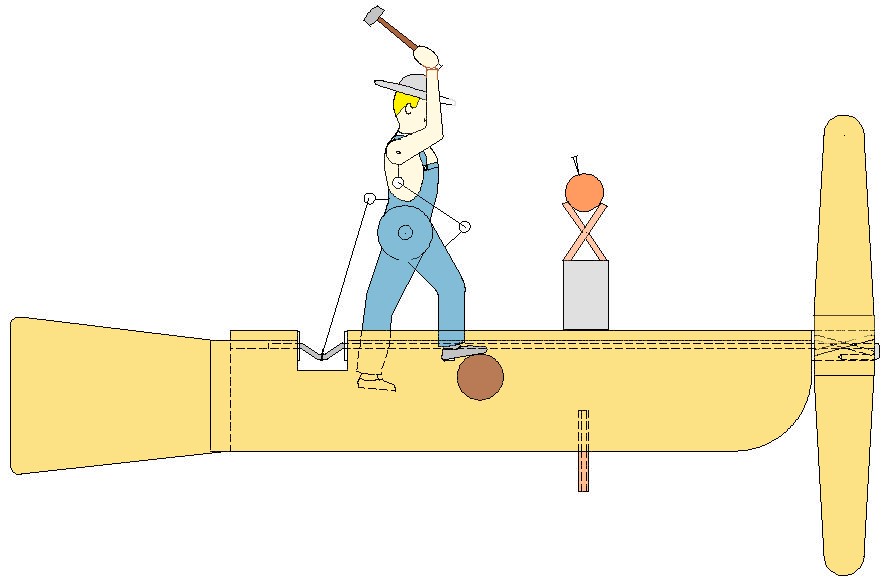
So if you made it this far, the articulated hammersmith should look like this. The platform holding the wood and spike may need to be moved around so that the hammer hits the spike.