


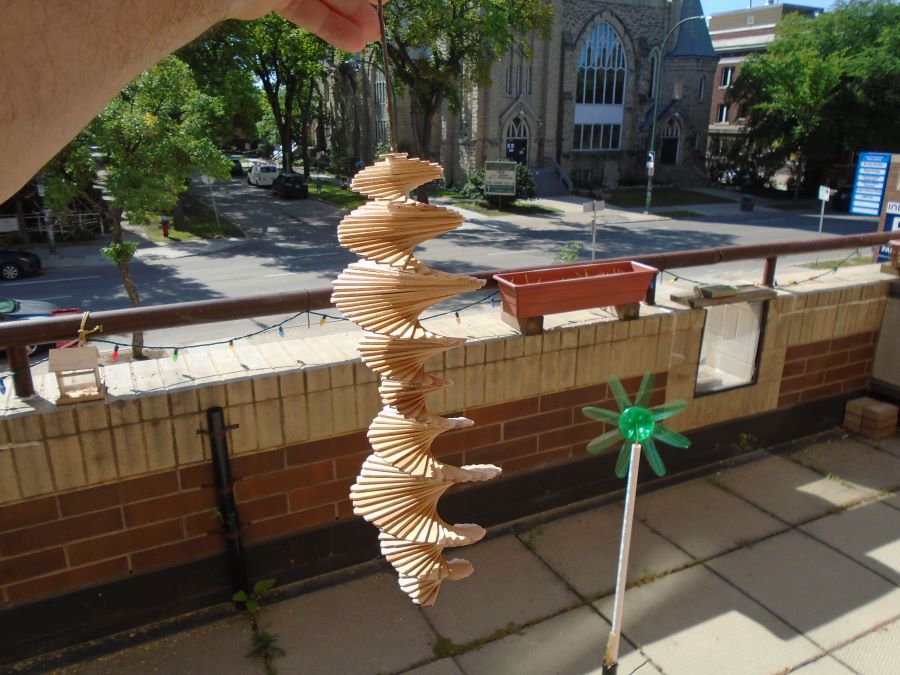
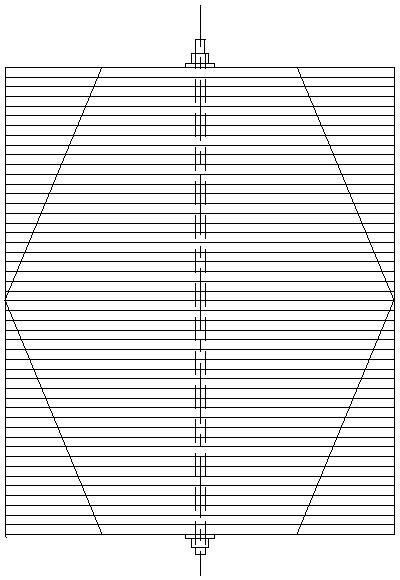
Here’s something cool that you can make if you have a collection of popsicle sticks. I still have to paint mine, but this is what it looks like so far. I’m going to draw it out here to show how I put mine together. I’m starting with about 140 popsicle sticks. There are two ways to make one of these: 1) by using threaded rod for the central support rod, or 2) by using straight wire or a straightened coat hanger as the central support. If you are using threaded rod, you will need a piece approx 1-1/2″ longer than your stack of popsicle sticks. If you are using ordinary rod or possibly even coat hanger wire, it should be long enough to reach top to bottom of your stacked popsicle sticks, plus 6″ (enough to make a hanging loop at the top, and a bent over section at the bottom). In my case, the popsicle sticks were ~ 12-1/4″ tall. Threaded rod is the better way to go, but I didn’t have threaded rod in 1/8″ dia, so I used a coathanger.
So the first step is to drill the popsicle sticks. You can set up a marking/drilling station, by clamping down some wood strips onto your drill press table, or work surface, to act as guides for marking. The purpose of this is to position and locate the halfway/center point on each popsicle stick.

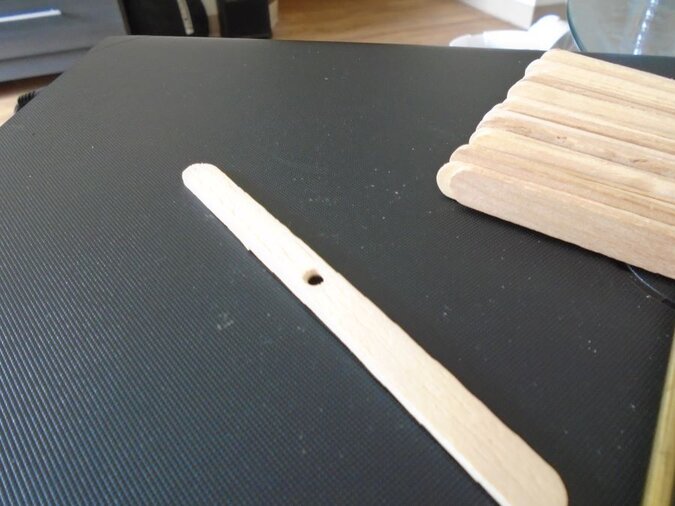

Drill each popsicle stick at the center mark. I’m drilling mine using a 0.140″ diameter drill bit. I’m using that size so that my popsicle sticks will accept a 0.112″ rod (I straightened out a coat hanger wire that was 0.112″ in diameter).
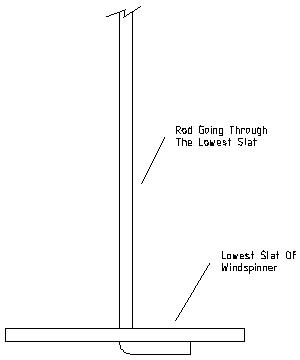
So if you are using a piece of wire or a straightened coat hanger, bend the end of your rod as shown. I bent over about 5/8″ (o.625″). Cut this supporting wire so that it doesn’t stick out from your lowest slat after it is glued. I glued the lowest slat onto the bent part of the coat hanger using superglue, and then slipped all the popsicle sticks onto the rod, after they were trimmed to size.
Marking And Cutting The Popsicle Sticks

Stack the sticks on their sides, lay them out on a flat surface, and draw 4 cutting lines onto the side faces of your windspinner. I have chosen to show the upper cut lines ending about midway between the ends of the blades and the central threaded rod. You can (and probably should) make yours a little tighter. The finished product looks a lot cooler when the blades are cut to a taper, rather than left straight up.


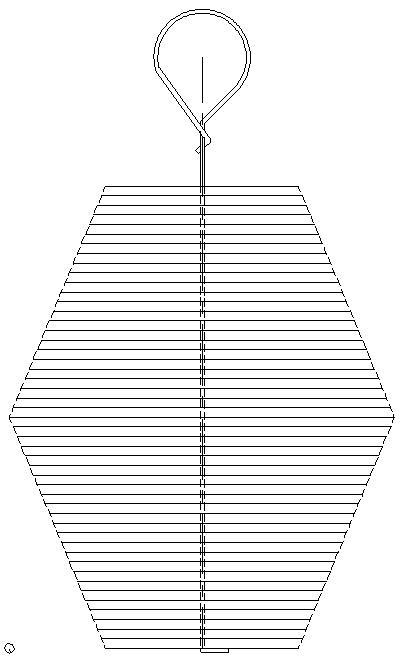
After each blade has been cut, glue that bottom blade/slat to the bent over portion of the central rod. Glue the rest of them together using wood glue (or reasonable facsimile), fan the blades out for the spiral effect, and pop a small dab of glue at the area(s) where the blades overlap and touch each other. Once each pair of blades are glued, leave them in that glued position and glue the next ones, until the complete spinner has been fanned out and glued. After all blades have been glued, let the glued parts dry (preferably overnight).
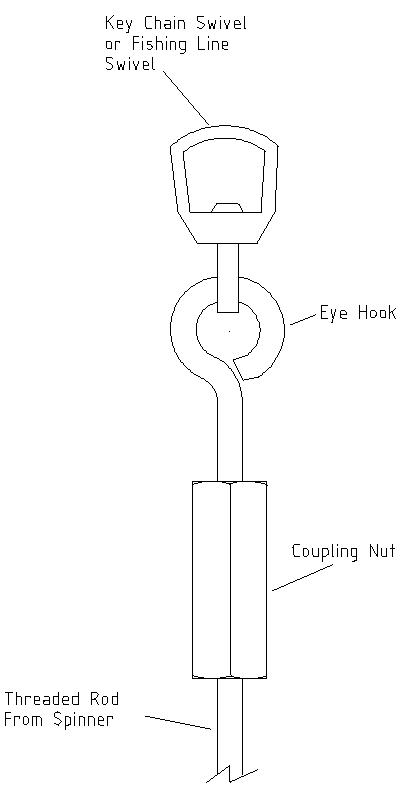
Another method some use to hang their spinner is to flatten out the top of the threaded rod and drill through it, and feed in a swivel at the drilled hole to hang it.
But the coupling nut method doesn’t require any drilling through the central rod. And, drilling through a 1/8″ diameter rod is almost impossible unless you have some kind of watchmaker’s tools.
So, after marking your cut lines, you can cut through the windspinner slats at the lines where they are marked. It will look something like this.
If your windspinner is all glued and it looks good (no gaps, fanned out into a spiral, etc, etc), then go on to paint the spinner. At the very least, it would be a good idea to coat the spinner with a coat of spar varnish or some kind of clear coat. If you don’t, the spinner won’t last as long. There are a lot of cool ways you can paint your project, I want to paint mine like a tie dye t-shirt. When I finish mine, I’ll add a picture here.
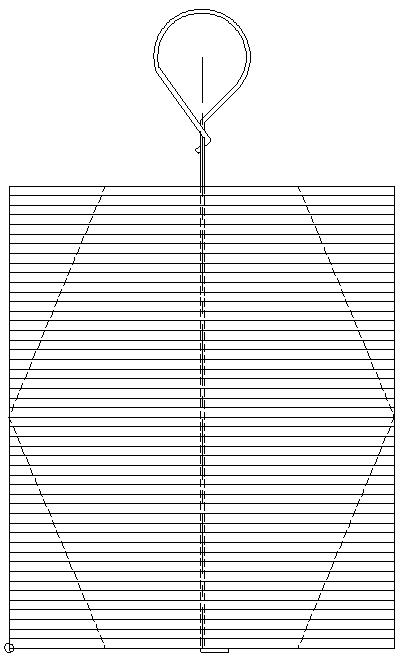
If you have made your windspinner using a threaded central rod, the windspinner can be hung using a coupling nut attached so that looks like the diagram shown.
The threaded rod at the top of the spinner threads into a coupling nut. An eyehook is threaded into the top side of the coupling nut, and a fishing line swivel or a key chain swivel is clipped onto the eye hook.
I haven’t shown it here, but the mounting chain or rope to mount the spinner is tied into the top of the swivel, and into your eave, or wherever you have chosen to mount the spinner.