
To make a vertical windspinner like you see here, start by collecting your wood pieces. It will work well if you use pieces that are 0.25″ to 0.375″ thick, 0.750″ to 1″ wide, and approximately 8″ to 10″ long. If you have wood scraps and can cut them down to this size, then power to you. You will need a minimum of about 60 pieces. If you can use more, your windspinner will look much cooler. You will also need a piece of threaded rod, (1/4″ dia, approximately 1″ longer than the total height of your wooden slats – you can get threaded rod from any Home Depot), and a pair of nuts with washers to fit the threaded rod.
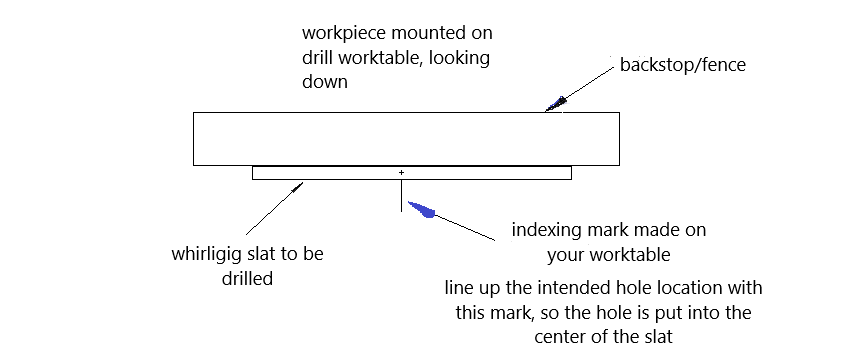
Using a 0.250″ drill bit and a drill press, drill a hole through the center of each wooden piece. To drill these holes, set up a stop, or a fence, so that you are drilling into the center of each wooden slat. And make a mark on your work table so you can align the center of each slat with your mark.
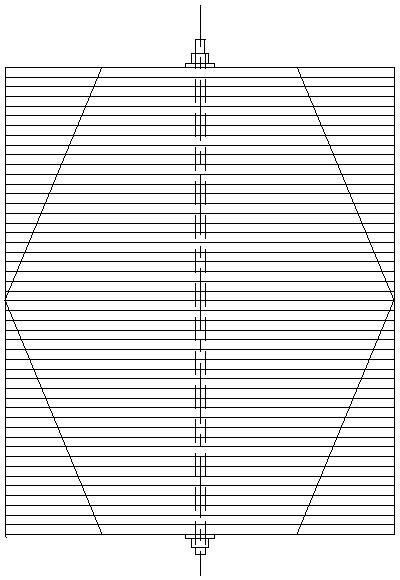
To mark the slats for cutting, run a piece of 1/4″ threaded rod through the slats as shown above. Add nuts and washers at the top and bottom and snug them up to hold the slats together. You can use a wing nut at the top position if you like. This will make it easier to tighten and loosen the assembly as you are working with it. Using a straight edge, mark out cut lines onto the slats as you see here. Then trim the slats to length using the lines as a guide. Sand the cut edges to make everything smooth.
There are two ways to mount the spinner. If you can drill through the central rod, you can use this method (I will show a second mounting method following this). At the top of the central threaded rod, drill a small hole through the rod. This hole should be large enough to accept a key ring. Deburr any sharp edges left during drilling.
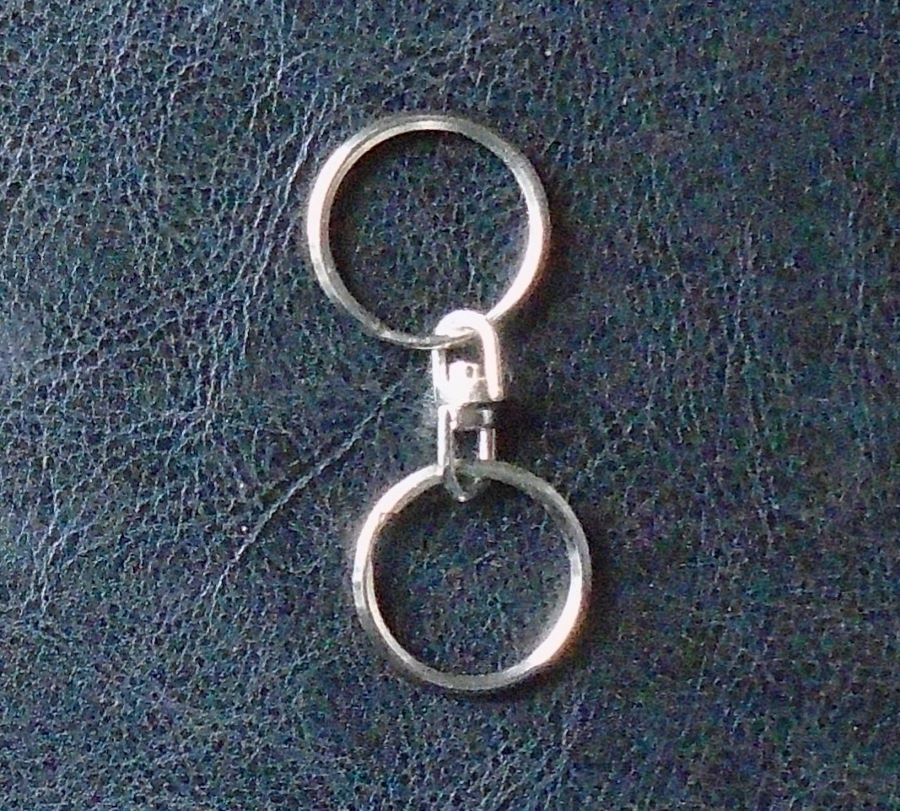
Find a swivel link (the swivel link is the thing you would use to attach a fishing lure to your fishing line – the swivel shown here is from a key chain), and add a key ring at each end, as you see here. Run the lower key ring through the threaded rod where you drilled a hole through the top of it. Then run a chain or cord through the upper key ring to hang it.
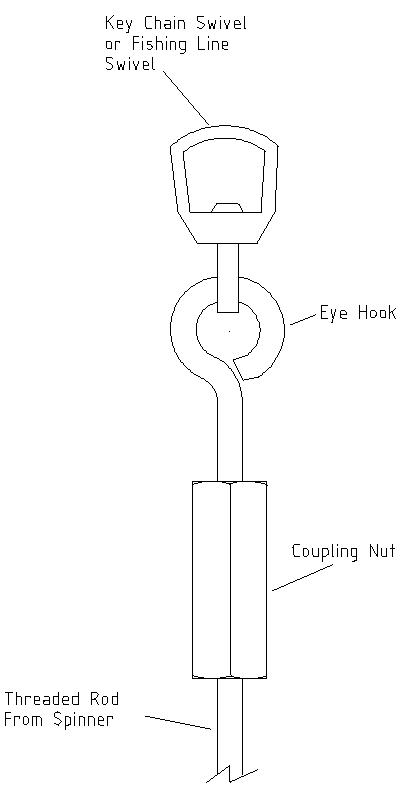
If you would rather not drill through the top of the threaded rod, you can mount your spinner using a coupling nut and an eyehook. That would go together as you see in this diagram:
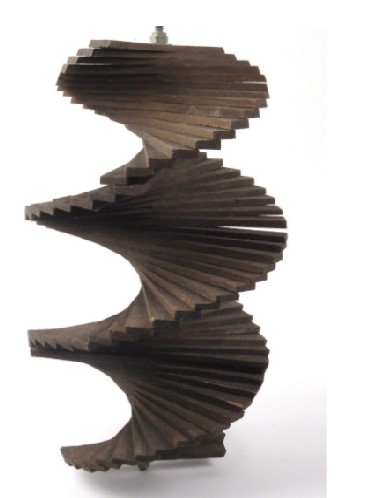
After you get the mounting hardware figured out, the last step would be to paint it. Loosen the slats slightly and fan out the slats to form a spiral shape. Tighten the holding nuts to hold the windspinner in its final shape, and finish it off with a coat of spar varnish, for a really cool look. You can also dye your wood slats first in bright colors if you want the psychedelic hippie look. Then find a windy spot, hang it up, and enjoy the cool windspinner you just made.