When making a whirligig, sometimes a difficult part is creating a drawing for the main subject of the whirligig. To make things a little easier, I have listed actual size tracing patterns for all the whirligigs I have included on this webpage.
Whirligig Pattern For Rodeo Russ
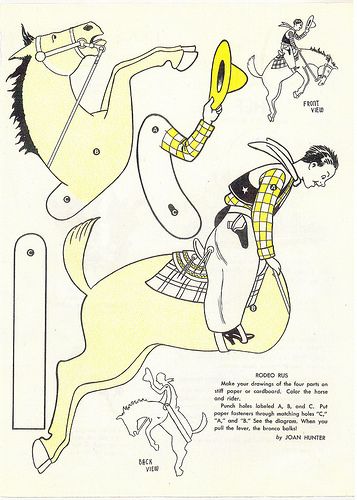
Rodeo Russ was originally created as a pattern for a 1930’s cardboard or paper toy that can be adapted as a whirligig. Save the image and blow it up to the size you need. As the instruction suggests, these patterns can be printed out on cardboard or stiff paper and then assembled to see how the whirligig would work, before building the whirligig.
Cutting Pattern For Saw Wielder And Woodchopper Whirligigs
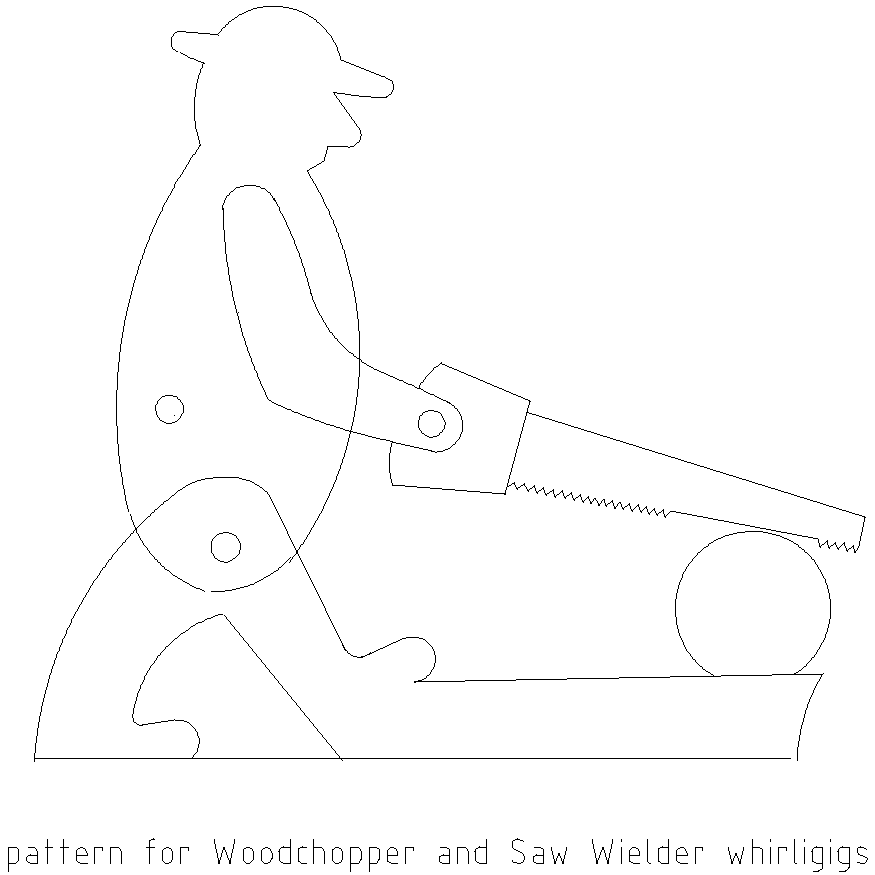
Here is my version of a cutting diagram that can be printed out and used for the Saw Wielder whirligig and the Woodchopper whirligig. The same man form is used for both whirligigs. This pattern is not perfect but it will save you from drawing it out if you want to use it. Size and print the pattern so it is approx. 7″ or 8″ tall, and cut it out.
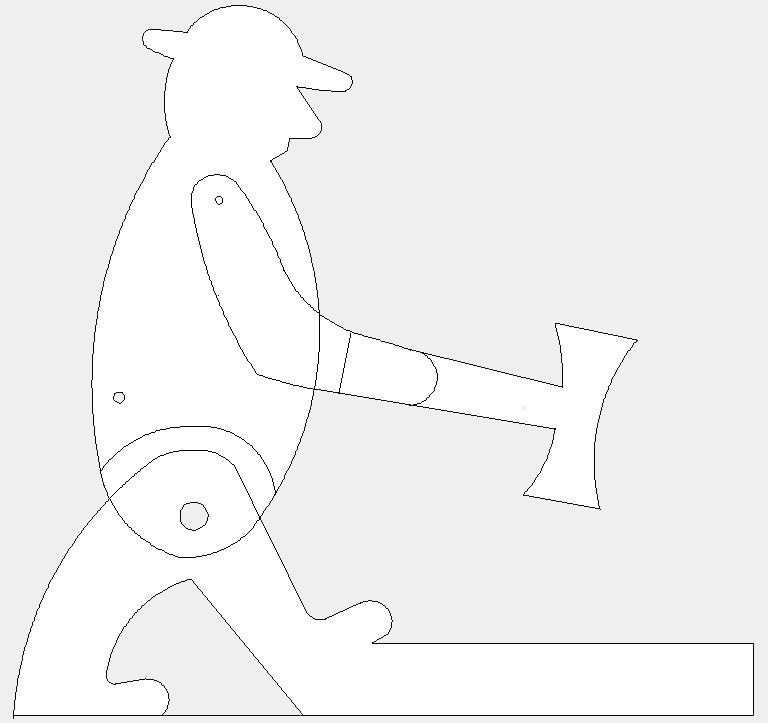
This is a tracing pattern I made up to cut out the parts for the woodchopper I am building. I sized it so the man figure would print out at about 8″ tall. I will be cutting the upper body from 3/4″ wood, and 2 more pieces of the upper body from 1/8″ ply. The 3/4″ upper body will be sandwiched between the 1/8″ pieces when assembled. The legs are cut from 3/4″ wood. The axe will be cut from 3/4″, and the arms will be cut from 1/8″ ply.
How A Flapping Wing Whirligig Is Constructed
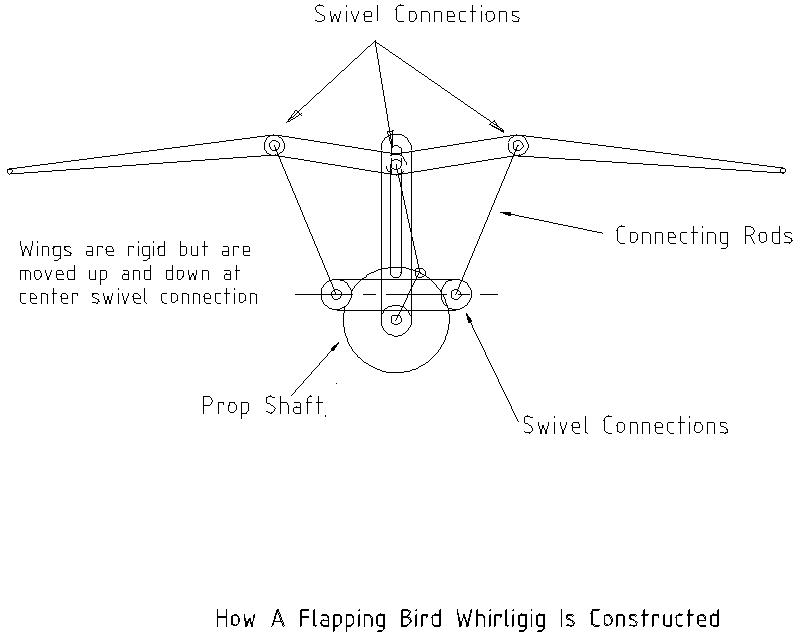
This is a diagram showing approximately how a whirligig with flapping wings would be constructed. This is as viewed from the front of the whirligig. The swivel points allow the connecting rods to slightly rotate within the solid wings and lower body.
Cardinal Whirligig Tracing Template
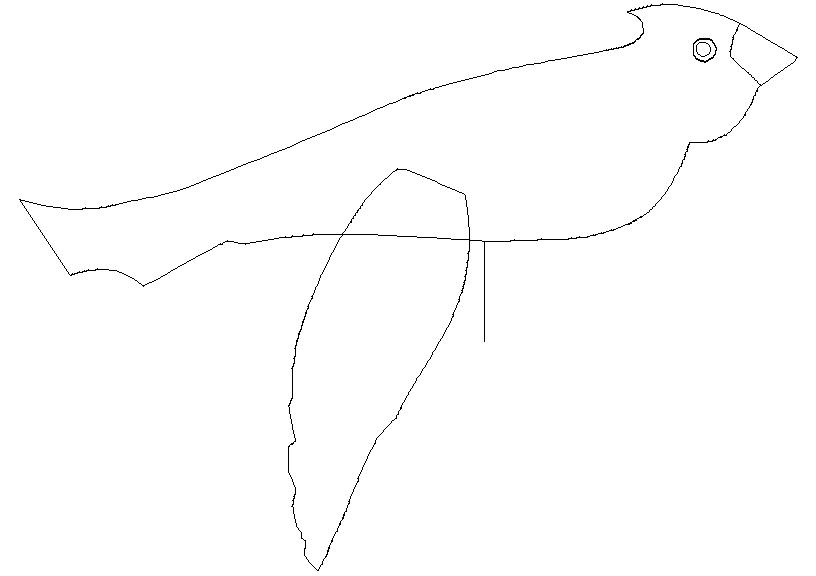
Here is a tracing pattern for a Cardinal whirligig. I have marked out the beak areas and what will be the eyes and head. I added these to the tracing pattern to make it a little easier to understand. When you print out this pattern, size the image so that it is ~ 8-1/2″ long. And that is a typical wing half at full size.
Woodchopper Tracing Pattern/Template
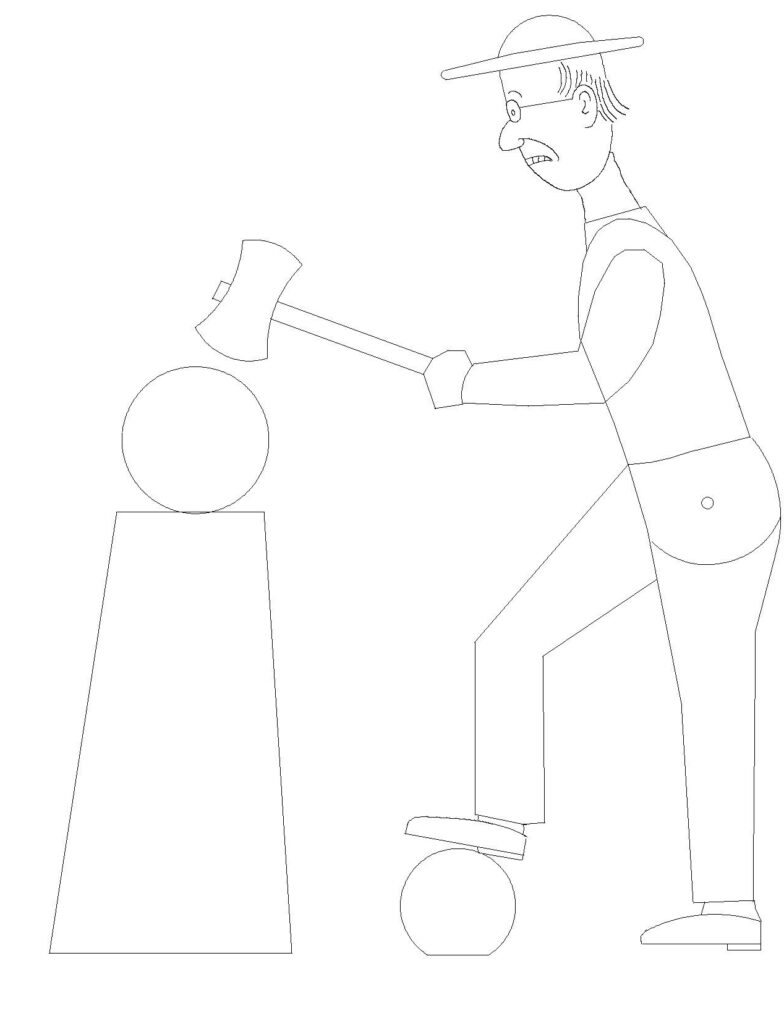
Here is a cutting pattern you can use to make a woodchopper whirligig. I have drawn and scaled it to a size of 8 inches so that you can print it out and trace it to make the woodchopper form. .
Snoopy And The Red Baron
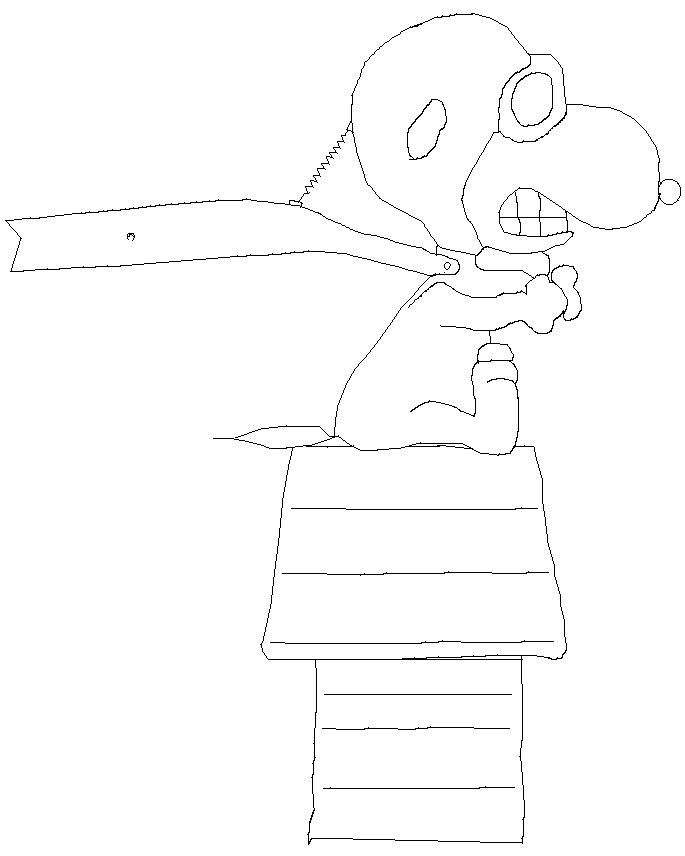
Here is a tracing pattern if you want to cut out Snoopy in his quest for the Red Baron.
A Sawyer Whirligig
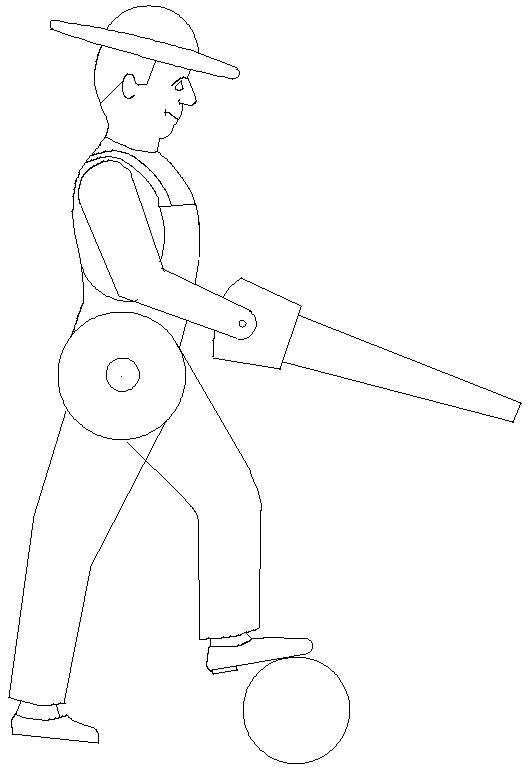
This is a pattern for my version of a sawyer whirligig. I think it should be scaled and printed out at a size of 8 inches or so. Since the sawyer is the part of the whirligig that should stand out, I believe that it should be about 8″ tall. If you are making this whirligig as per my diagrams, the lower 1 to 1-1/2″ of each leg overlaps and is fastened to the lower body.
The Railcar Whirligig
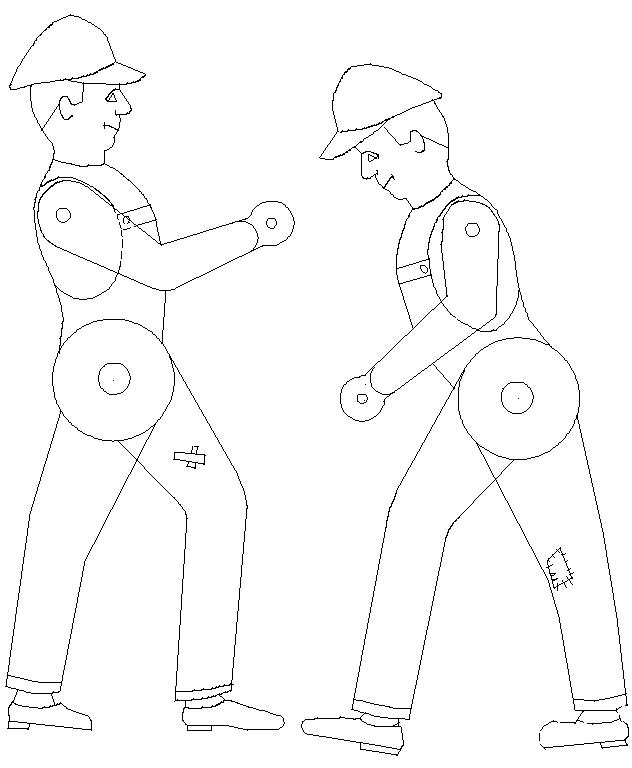
Here is a tracing template that you can print and use if you want to cut out the rail car worker figures. I have sized them so they are a height of 8″. They are drawn so that the arms pivot at the shoulders and the bodies pivot at the hip position. The authentic uniforms for rail workers is usually pin striped overalls and hat.
The Articulating Hammersmith
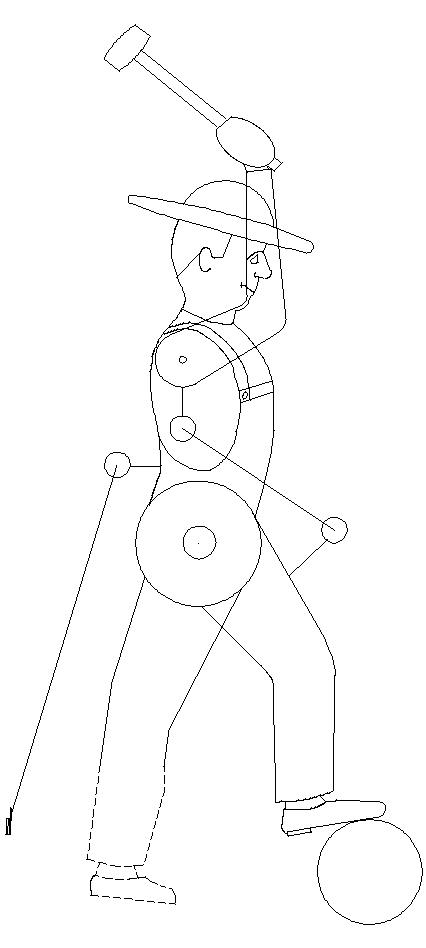
Here’s a tracing template for the Articulating Hammersmith whirligig. The intended size for this figure is 8″ top of cap to toe.
Two Men Cranking
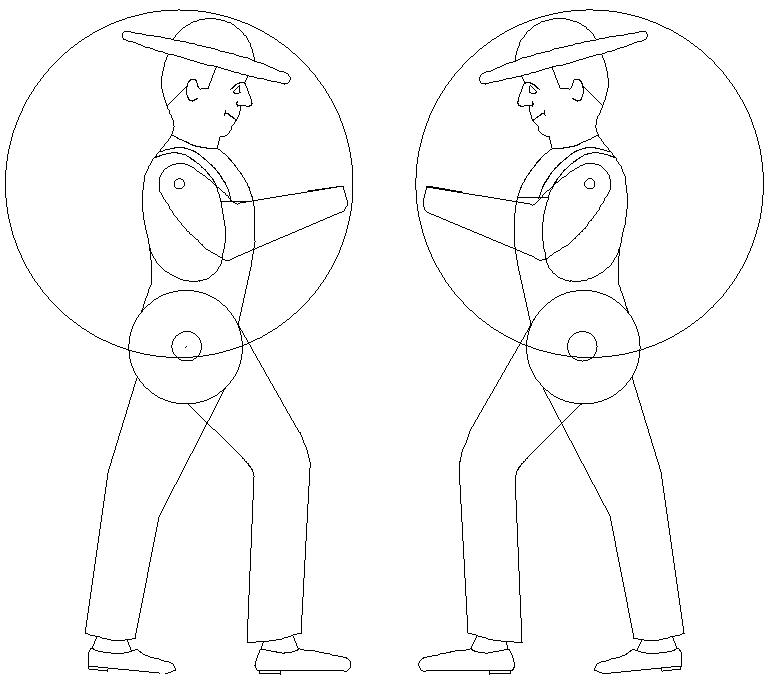
This image is for tracing out and cutting the man figures for the two men cranking whirligig. The figures are sized at 8″ tall. The legs connect with the main body and swivel at the hip. The arms connect and swivel with the main body at the shoulders. The swivel joint at the wrists is located along the line of a circle of approx. 2″, with its center at the shoulder joint.
